Monthly Archives: November 2009

Bookmarks Can Be Inexpensive, Personal Gift

Turn your artwork into custom-made gifts that fit your budget

by Stephanie Ferguson

In these tough economic times holiday giving can be a challenge. Many people are turning to homemade gifts, and in my opinion a homemade gift is the best kind. Looking for a great, personalized gift that says “I made this just for you”? Looking for something your children can give? Look no further.

bookmarks1 bookmark fan2

In addition to being something everyone needs and uses, bookmarks can be a great way to show off artwork. Besides having your artwork printed, you can use your children’s original art, or they can prepare art on the computer. Another idea is putting together a collage using mixed media. And you can personalize the gift for someone special. Only your creativity limits the final product. Slip the art into a vinyl bookmark sleeve, add a tassel and your task is complete. If you want to protect the bookmark and dress it up as well, save money by purchasing the bookmark sleeve and tassel together as a “bundle.” The more sleeve and tassel bundles you buy, the more you save.

Gift ideas include:

• Stocking Stuffers
• Enclose with gift books
• Children’s gifts to grandparents
• Child’s gift to teacher. Decorate the front and write a poem or message on the back.
• Showcase your own artwork on the front and put your contact information on the back so the bookmark can do double duty as a business card.

When it comes to tassels, Oak Creek Printworks carries more colors than anyone.  Holiday favorites include Tinsel Twist (red and green with gold tinsel), Christmas (combination red and green), Candy Cane (combination red and white), Royal Blue, Red, Green, The Precious Metals set includes Antique Gold, Silver, and Copper.

Our bookmark sets include the plastic sleeve, and a tassel. You can buy the card blanks separately. If you are interested in custom printed bookmarks, we can do that for you too!

We’d love to hear from you. Please leave a comment on this article by clicking on “Add Comment” below, or send us photos of your creations (jpeg format, 72 dpi). Perhaps your work will be posted on our blog!

A little wisdom for the struggling artist

by Georgia Lange

There are many us artists out there who find it difficult to turn our art into thriving businesses. It is enough of a challenge for us to create the art to begin with; when it comes to actually exhibiting and selling our work, a lot of us start to feel stuck with questions as to how this can be accomplished. There are, of course, many exceptional artists who simply have a knack for the business and marketing of their work. Others hire representatives to help them deal with these issues. If you fall under the latter, good for you! If not, and you are feeling a little lost at “marketing” sea, Sylvia White is your lighthouse.

Sylvia White has been offering career advice for artists since 1979 as it relates to exhibitions, business, and marketing. If you have a question regarding the development of your career as an artist, her advice articles will be of great value to you.

Check out Sylvia White’s site for more information.

And thank you, Sylvia, for the wonderful wisdom you are willing to share! We are eternally grateful!

10 Easy tips on displaying your greeting cards

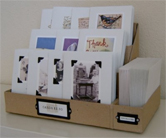
OK, you’ve decided that one way to sell your artwork is on greeting cards. You’ve found some places to sell them – craft fairs, farmer’s markets, local merchants. However, displaying them in booths or on the countertop is different than displaying larger artwork. The most common ways to display cards are in spinner racks, on slat walls, on acrylic shelves, and in free-standing displays. Any display that shows the full faces of cards is ideal. Beyond that, greeting cards aren’t exactly a three-dimensional product, sometimes making them difficult to display creatively.

Here are some easy tips on how to display your cards for sale.

1. No room for a table top display at your farmer’s market booth? Show them off on string or colorful ribbon strung between the posts of your booth or hanging vertically. You can even find mini-clothespins at a craft store to attach them. Keep cards for purchase stored in a box under the table.

2. Make shoe boxes (perhaps wrapped in wrapping paper) with dividers for clients to sort through. Just Something I Made is a wonderful blog on how to build a tiered box system for displaying your cards.

JustSomething

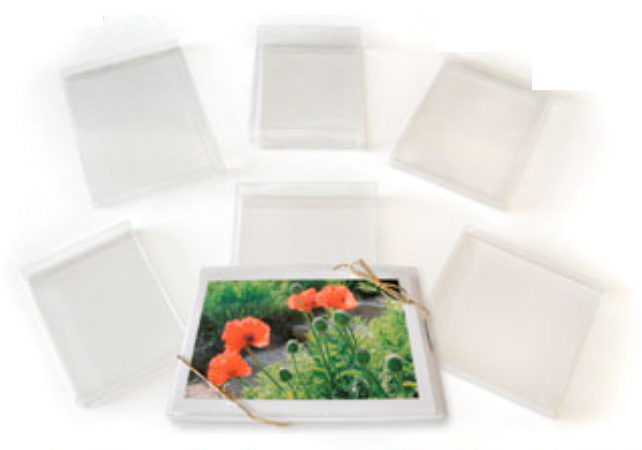
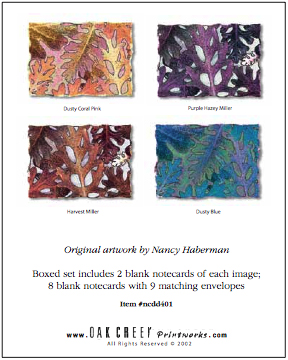
3. Sell sets in clear boxes. Prepare a sheet for the bottom of the box that shows all the card designs included in the box, as shown below:

ClearBox ClearBoxInsert

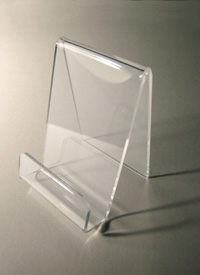
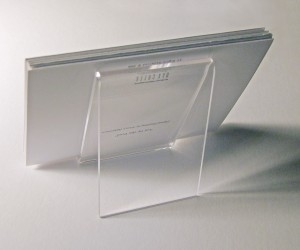
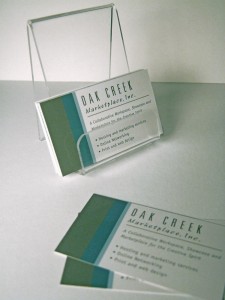
4. Buy acrylic cardholders for counter-top display. These can be very inexpensive, and are perfect for displaying just one or two card styles on a countertop. Oak Creek Printworks carries small and large stands.

AcrylicEaselSm BackEasel BCEasel

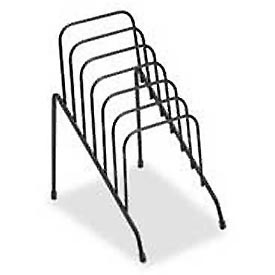
5. Use office divider racks to display your cards. Some office supply stores have what they call “junior” racks, which are smaller than the 8.5 x 11 file size racks (too big for greeting cards).
WireRack

6. Laminate your cards together on a large sheet of paper. If the cards are blank inside you can just show the fronts. If there are verses inside you will want to show both the front of the card and the inside.  These laminated “posters” can be displayed on a table or by hanging on a wall.  Depending on the size, they can also be displayed in an album or flip chart. The art always stays clean, and you can even use dry-erase markers to write on the poster, and wipe it off later. Perfect for listing prices or emphasizing sale items. The actual cards for purchase can be stored in a box or file under the table.

7. Display your art online using a website or a blog, such as Facebook or WordPress.

Facebook – Display your designs and cards on your own facebook page. Link to your blog on WordPress. Join groups of artists who will link to your page and blog, like the Graphic Artists page.

WordPress provides public domain blogging software, which means it is FREE! It is easy to set up an account. Here are some examples of sites that are selling cards with WordPress sites:

Rikki O’Neil and Friendship cards

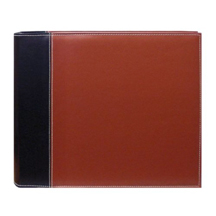
8. Use a scrapbook or portfolio book to display the cards on a counter top, and store actual cards for purchase in a box or file underneath the counter. The scrapbook can be purchased or even homemade.
scrapbook
9. Arrange a 3-D display on heavy posterboard using the adhesive 3-D dots that scrapbookers use for their album pages. The downside to this method is that if the display board or cards get dirty or dogeared they can be hard to clean.

PopPoster-Cards dotPoster

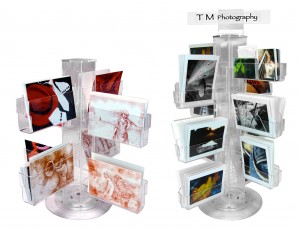
10. Acrylic Spinners – a perfect countertop or floor display.

Blog-spinners

Don’t forget, when displaying your cards, the best way to protect the artwork as potential customers handle them is to use some type of protective sleeve. Check out our card jackets, no-flap bags, and protective closure bags.

We hope that this information has helped you, and would love to hear how you display your products. Leave a comment, or send us an email at info@oakcreekprintworks.com. Include a photo and we will try to post it here on the blog.

Greeting cards at the Post Office? How can you cash in?

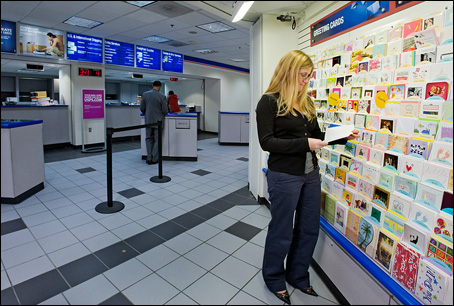
That’s right – at the post office! The financially troubled U.S. Postal Service has a “get well” plan that includes selling Hallmark greeting cards at their local branches. Check out the Washington Post article for full details.

PostOffice

Marketing Your Artwork

So how can greeting card artists cash in on this plan? While you can’t compete with Hallmark at the USPS, check out your local mail franchises, such as Postal Annex, Mail ‘n More, PostNet, etc. Our community also has several postal sub-stations (franchises) at various locations, such as the Sears Catalog Store. Franchise owners are often willing to display greeting cards. You can check on the franchises in your community on franchisegator, franchise-guide, or at postalconnections.

How you display your artwork and cards is very important. While you might not be ready for a large spin-rack, the cost-conscious artist can start out by using our individual acrylic stands. They come in multiple sizes, and are reasonably priced.  Check out our clear acrylic small card/print stand, our large card/print stand, and our print/calendar holder. Each stand will hold multiple cards and envelopes.

A little help with artist’s block

barbara

Ever suffer from creative or artist’s block? You are not alone in this. It happens to all creative people actually, including visual artists, poets, designers, musicians and writers.

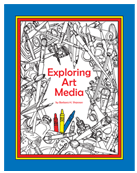
One of our clients, Barbara Shannon, has developed a terrific resource book that can act as a creativity catalyst. This book is often used in public schools and for homeschooling art courses, and has been designed as an introduction to art media, but it can also expand any artist’s knowledge and help break that frustrating creative block.

The book, Exploring Art Media, introduces the incredible variety of media, materials, tools, and techniques available to the artist.  It covers color & design, drawing, commercial art, cartooning, painting, three dimensional art and arts/crafts. There is also a companion California Teachers Guide, for those artists who also teach.

Along with media exploration, the book teaches:
* Observation and drawing skills
* Color manipulation
* Implementation of art elements, concepts, and principles
* Art appreciation
* Environmental awareness
* Historical influences
* Creative thinking
* Painting techniques
* Sculpting methods

Check it out for yourself.

eam_book

Cardmaking Made Easy

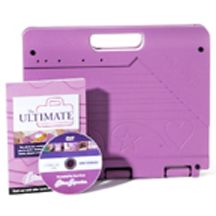
A friend recently asked me to try out the Ultimate Crafter’s Companion (UCC), the latest in cardmaking accessories from Crafter’s Companion, but frankly I was skeptical. What could this “little pink suitcase” do for me that I couldn’t accomplish with a ruler, paper cutter and scissors? While I usually jump at the chance to acquire new crafting tools, I wasn’t convinced that this was really anything different from what I already had. Boy, was I wrong. Actually, I was blown away.

Easy Folding
My first discovery was a simple but important one—the ease of folding cardstock. Anyone who has tried making their own cards knows the frustration of folding the cardstock, only to discover it is slightly uneven. Refolding looks awful. I was amazed to discover that the Ultimate Crafter’s Companion  provided a way to fold any size card in half in seconds, with perfect, professional results every time. No measuring, no guessing, and no mistakes. I’m a fan of saving time, so this was a good introduction to this new product. And it only got better.

Envelopes
After watching the instructional DVD I couldn’t wait to get started making the unique cards, envelopes and boxes I saw demonstrated. They even have what they call an “envelobox” for extra thick cards. I love the idea of being able to make a perfectly sized envelope for any size card, add a contrasting liner and even emboss the flap. I had never been able to master the art of making envelopes, but it will never be a problem again. The creative possibilities are endless.

Make your own gift boxes
Once I tried boxes I couldn’t stop making beautiful gift boxes. Just in time for the holidays! The lids fit perfectly – no measuring on my part. This system is fabulous. Just like the envelopes, the UCC folks have done all the thinking and measuring for you.

Ultimate Crafter's Companion

Ultimate Crafter’s Companion

Speaking of holidays, this winter I’ll be sending out some stunning cards—without the stunningly high price tag. Join me in tackling some fun holiday projects.