Category Archives: Paper

Oak Creek Printworks is on Etsy

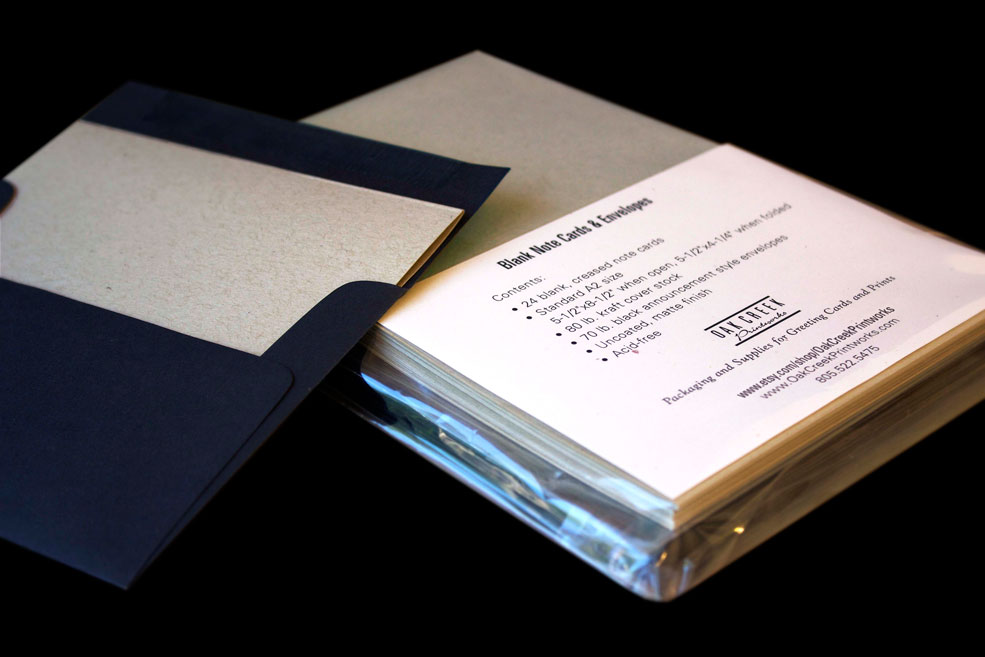
24 packaged note cards and envelopes

Our blank kraft paper note cards and black envelopes, sold in a set of 24, is sure to help inspire your creativity and showcase your own unique artwork. This product is only available through our new Etsy store!

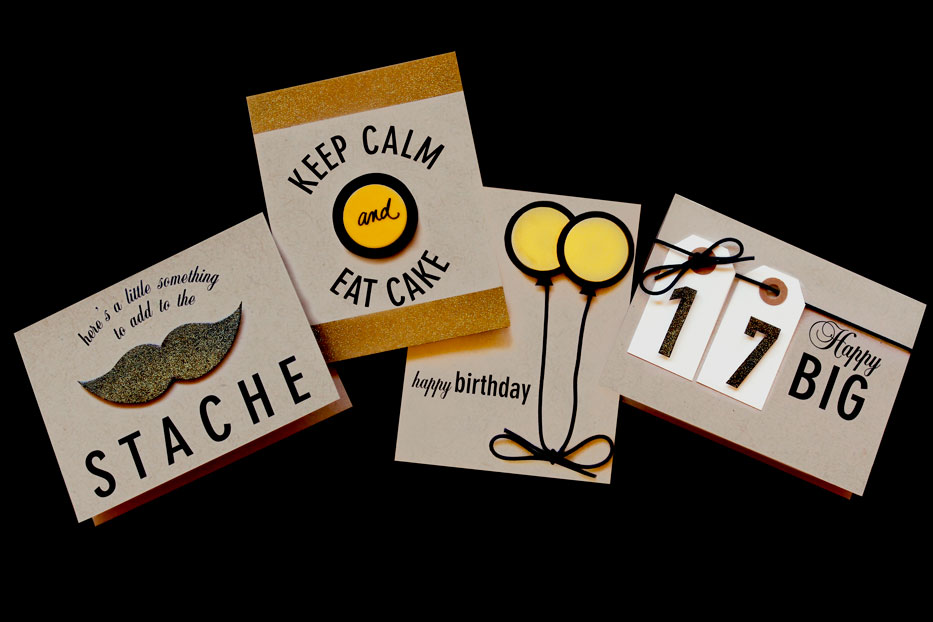
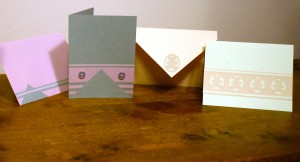
4 sample cards

To help display the blank cards, we created some of our own sample designs using products that are already available from Oak Creek Printworks.

Design and create personalized greeting cards using products at our new Etsy store, where shoppers will find select items that aren’t available on the Oak Creek Printworks website.

A set of 24 blank kraft paper note cards and black envelopes is our first item in the new Etsy store. The black, square-flap, announcement style envelopes are uniquely paired with 80 lb. kraft paper cards for an acid-free, environmentally friendly card with a more formal look.

We’ve used some of the products already available on Oak Creek Printworks to create the examples shown here: gold seals, adhesive foam squares, black elastic stretch loops.

We hope these cards will inspire our readers to bring their own creations to life! To learn more about the blank kraft paper cards with envelopes visit Our Etsy Store.

We pride ourselves in helping artists market their cards and prints. Send us your creations by snail mail, or 300dpi .jpg,  and if we publish your art on our blog, we’ll link back to your website.

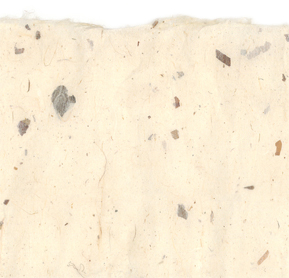
Add Natural Texture of Mulberry Paper to an Image

High resolution photos are hard to find without purchasing. If you are looking for photos to use as backgrounds in your artwork, look no further. To download this week’s image, click on it. When the high resolution copy appears, right click on it to copy or save it.

The 11×17-inch scanned image of mulberry paper can be used as a background in graphic design or photo illustration, crafts or greeting cards, and gives the appearance of natural texture. Any time you are printing and desire a paper color and texture other than white, consider scanning a natural, handmade paper, where each sheet is unique.

mulberry paper thumbnail

Terms of Use: You can use this image for anything you wish (e.g. advertising, printed materials, product packaging, presentations, brochures, greeting cards, postcards, book covers, etc.) as long as you do not copyright it or resell it. Oak Creek Printworks and Oak Creek Marketplace, Inc. are not liable for any damages incurred by your use of the image. ©2011 Oak Creek Printworks

Clear bags protect greeting cards and more

clear bags for mailingClear bags aren’t just for greeting cards and note cards. These crystal clear sleeves have all the benefits of double-sided full color envelopes at a fraction of the cost. Clear bags are suitable to send through the U.S. postal service,  provided you follow a few simple rules.

A clean, white label area on the inside or outside of the package, preferably, but not necessarily, with a bar code. Bulk postage, bar code and address information can be printed directly on the the mailer, while postage stamps must be canceled; therefore they must be affixed to the outside of the sleeve in the proper position. It’s always best to check your design, printing and mailing plans with your local post office to confirm current postal regulations.

Benefits of clear mailers are huge. There’s no question that we’re hooked and will open “The Printer’s Glove of Choice!”. There’s some depth to the package, so surely there are samples inside, and the Golden Arches help seal the deal. The Aflac mailer, like all of Kaplan Thaler’s (Aflac’s ad agency), advertising, is enticing and clever. Because the envelope is see-through, the duck’s layered feathers reveal a unique die cut brochure, different enough to catch anyone’s eye and encourage them to open the envelope.  Aflac’s mailer does not disappoint, unless, of course, you were expecting sound effects.

You can find clear mailing envelopes in a variety of size and seal styles by clicking on this link on the clear bags page.

Aflac ad opened


Fashion colors of 2011 highlighted

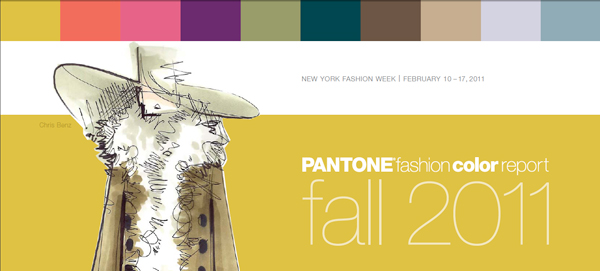
pantone fashion color report

“Designers take a painterly approach to fall 2011 by artfully combining bright colors with staple neutrals, reminiscent of how an artist would construct a stunning work of art,” said Leatrice Eiseman, executive director of the Pantone Color Institute. “Much like a painter’s masterpiece, there is a certain romance to this season’s palette.”

And because designing on paper and designing for fashion are so closely related, it’s worth taking a look at the fashion world’s color selection for 2011.

Cardmaking: Creating depth with cutouts

by Nancy Haberman

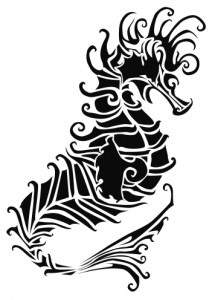
Recently I assisted a colleague who was learning the finer points of Adobe Illustrator’s pen tool. Our goal was to create images that would adorn products related to the sea. The resulting artwork of a seahorse was intricate and stunning, and a discussion followed about using it on a greeting card.

Commercial greeting card publishers have forever pushed the envelope when it comes to greeting card presentation techniques, relying heavily on high end print and print finishing processes. While holographic and lenticular printing are too pricey for the average working artist and crafter, other finishes like die cutting, embossing and engraving are now within reach of those willing to invest in new desktop equipment and take the time to learn how to use it.

The desktop publishing revolution turned artists and crafters into self-publishers. Fast forward 25 years later, and a trip to Border’s, Target or any greeting card store reveals that it takes more to excite the eye of a card buyer in 2010 than cheap two-dimensional Photoshop effects, long ago passé. Continue reading

Greeting Cards: Simple, Fun, Classy and Budget Conscious

by Kimberly Foster

In today’s economy, every penny counts.  Making classy, creative, expensive-looking greeting cards, invitations, place cards, bookmarks, and envelopes to match, will fit into any budget.   All you really need are 3 things to get started, and chances are good that you already have them: paper, glue and scissors.

You can actually create your own cards and envelopes with any type of paper you choose, but if you just want to dive right into decoration, you may want to start out with ready made blank cards and envelopes. Blank cards are a perfect way to get started making professional looking cards even if you are just beginning.  They truly leave you little room for error!

So, once you’ve either purchased or made your blank cards, it’s time for the really fun part. Continue reading

Papercut design leads to Louie Award winning cards

by Nancy Haberman

My fascination with paper cutting and paper crafting began in the 70s at an exhibition of Jewish folkart at the Skirball Museum in Los Angeles. To be honest it probably began in kindergarten when I was given a pair of scissors and colored construction paper, but then that would be a different post.

I suppose an attraction to the graphic nature of paper cuts is not uncommon given that many religious and cultural traditions have used paper cutting in their folk art and marriage documents for centuries. I saw a lot of this kind of art on the walls of friends and family – they are part of my earliest memories.

Continue reading

How do I measure my artwork for matting?

By David Heyman

A mat makes any image look more professional. Even without a frame, simply matting your photographs or artwork will do wonders for the presentation, and sales potential, of the work.

Although mats come in many standard sizes, if you are working with custom size images, or anything that is done on a paper that is a creative size, your mat will need to be custom cut. Oak Creek Printworks offers custom cut mats, at a cost relative to a standard size mat, with no extra charges.

How to give the correct measurements for a custom mat is one thing that many artists find confusing. Since custom cut mats are cut to order, it is important to have your borders and window measurements accurate. While you can always call David, our custom picture framer, at (805) 390-4955, with any questions on sizing of borders and windows, the following is a guide that will give you reliable results:

  • Measure the outside edges of your image. Do not assume your image is a certain size. You may have ordered an 8″ x 10″ photograph, but the image actually measures 7-7/8″ x 9-7/8″. If you are matting artwork on paper with an uneven edge, such as a deckle edge, measure the narrowest part of the horizontal and vertical sides, as shown in this photo.

* Add photo of deckle edge watercolor paper, showing w/ ruler how to measure*

  • Decide if you want even borders for your mat, or a weighted edge. Some people feel that having the bottom border of the mat slightly wider makes the image seem more centered when viewed from a distance. This is called an “optically centered” window.

CenOPCenMats2

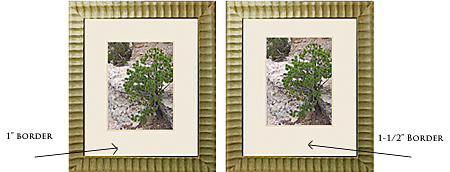
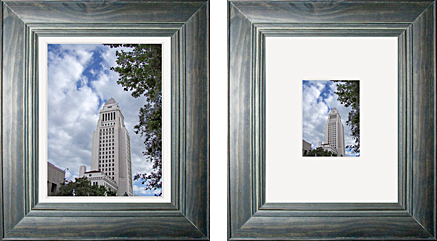
  • How wide do you want your mat? A narrow mat allows the image to stand out more and can fit a tight frame. A wide border gives the work dramatic presence and can transform a small image into a large piece. Whichever you decide is up to you, it is just a matter of personal taste. Here are examples of both styles:

NarrowWideMats

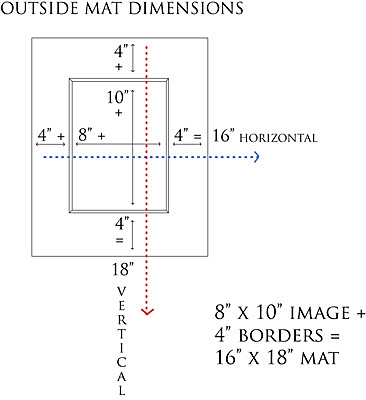
  • When you have this information, perform these two simple calculations, and you are ready to go: To get the outside dimension of the mat, add the horizontal dimension, the width of the mat and the width of the mat again. For example, if your image is 8″ x 10″, and you want a 4″ wide border, add 8 + 4 + 4 = 16″. Do the same with your vertical dimension, in this example – 10″ + 4 + 4 = 18″. So your outer mat dimension is 16″ x 18″.

OuterMat

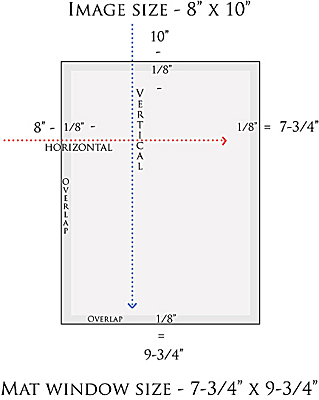
  • The second calculation is your window size. That is simply your image size, minus a slight amount for overlap. Since the window will cover the edges of the image, it needs to be slightly smaller than the artwork. We recommend a 1/4″ overlap, which will allow enough room for overlap and attachment to the back of the mat. In our example, with an 8″ x 10″ image, your window size would then be 7-3/4″ x 9-3/4″.

Print

With practice, this process becomes second nature, and can be quickly transformed into a host of eye-catching sizes for all of your pieces. Taking a little time to measure your own custom mats can save you much time when preparing your shows and matted prints. Which will then give you more time to do what you do best – creating!

The Benefits of Archival Mats

by David Heyman

The function of a mat is to give breathing space around your artwork or photograph, letting the eye have a place to “rest” while taking in the image. A blank, neutral mat border surrounding the work adds class and transforms what could be a snapshot into a real work of art. Notice the transformation of this image from a plain poster frame, into a professional, gallery quality display, just by the addition of a mat.
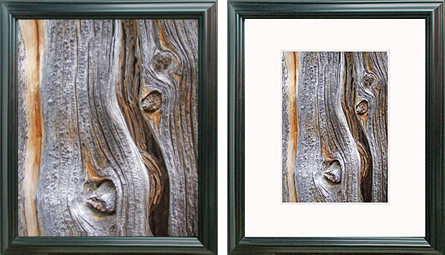
The image on the left looks like a decorative poster, while a mat instantly transforms it into a work of art.

The image on the left looks like a decorative poster, while a mat instantly transforms it into a work of art.

Mats come in many shapes, sizes, colors and textures. However, one crucial element  is often overlooked when selecting a mat: whether or not it is archival in quality.

The majority of mats on the market today are made from wood pulp, the same substance used to make mass-produced paper. While paper products made from wood pulp are inexpensive and abundant, their use in displaying and protecting artwork is limited, due to their rapid decay and discoloration.

Wood fiber contains lignin, an acidic substance that is a cellular component of trees. When that fiber is made into paper, including mats, the lignin remains in the finished product, making it a ticking time bomb for eventual disintergration.

Acid causes mats to yellow, staining your artwork in the process. Gone unchecked, a paper mat will eventually turn brown and become brittle, spreading acid burn on to your work. While substances can be added to the paper fibers to slow down the deterioration, they are temporary, and no mat made with wood pulp is suitable for archival use.  Look at the effects of a wood pulp mat on this photograph:

Notice the yellowing and discoloration on the image matted with an acidic wood pulp mat.

Notice the yellowing and discoloration on the image matted with an acidic wood pulp mat.

The finest mats are made with cotton, a fiber that is naturally free from lignin. 100% cotton mats will never yellow, turn brittle or damage your valuable work. Although initially more expensive than the imported mats made with wood pulp, Oak Creek Printworks Bainbridge Alphamats are a good investment, ensuring that your art is protected and will never be ruined by the careless addition of an acidic mat.

When choosing a mat for your work, never settle for “acid-free”. This is a term thrown about so often it has become almost meaningless. Anything can be labeled acid-free, but that doesn’t mean it will last. An acidic wood pulp mat that is sprayed with an akaline coating is called “acid-free”. Yet the acid in the mat will quickly overcome the coating, and it will have worn off even before the mat is used for diplay.

Here are some criteria to use when selecting a fine quality archival mat:

  • Is it made from wood pulp, “high alpha cellulose”, or 100% cotton?      Nothing is as stable and naturally archival as cotton.
  • Is the mat just “acid-free” or is it truly archival?    An archival mat never needs to be processed or coated to have acid removed, as there is no acid to begin with.
  • Are your mats imported from China, or made in the USA?   Don’t be fooled by offers of “acid-free” imported mats that are too good to be true. Our archival mats, in a bright white, cream, black and gray, are made in the US, and cut right here at our studio.

One quick way to check if the mats you have are truly archival  –  look at the bevel (the slanted cut right next to the window of the mat). Wood pulp mats start out with a yellowish core, which quickly turns brown, as shown in these photos. A cotton mat starts out with a bright white core.
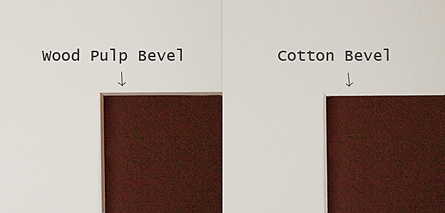
On a wood pulp mat, the bevels start out yellow, then quickly turn brown.

On a wood pulp mat, the bevels start out yellow, then quickly turn brown.

Your artwork is your passion. Never compromise or hurt your images with an acidic mat.