Tag Archives: background

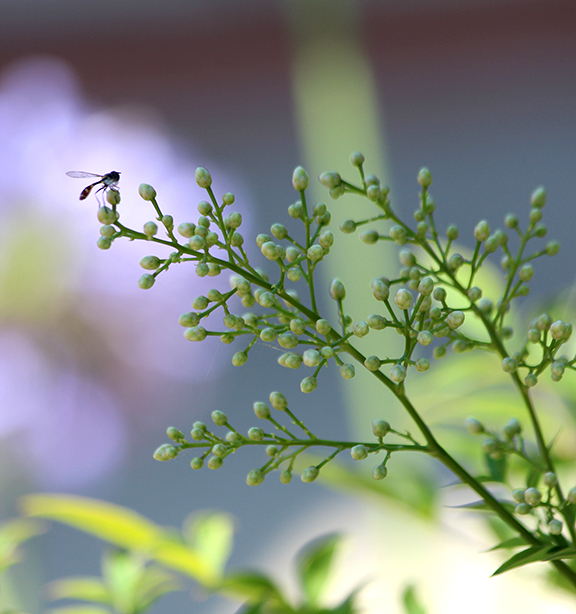
Delicate Balance

This image was cropped to a square to ready it for a square greeting card design.

This image was cropped to a square to ready it to print a square greeting card.

A tiny flying insect that I called a “fairy-fly” landing on the flowering Nandina, aka Heavenly Bamboo, inspired me to do a quick photo shoot on my lunch hour last week.

“No matter the time you live, no matter who, or what you are, every one and every thing is in delicate balance.” Should I add typography to this image? What words? Different words? The jury is out. What do you think?


Not Another Green Marble Background?

For a designer, creating a new look for a green marble background is like bringing out the old bell-bottoms and believing they look as cool as they did in 1969.

Filling a “simple” request can be not-so-simple if you make a lot of blind starts, like spending an hour hunting down an old CD filled with stock marble images, just to find they are in an outdated graphic format.

A second blind start—searching stock images—another hour easily wasted as I realized, why not create an original image? Not only can it be easy, but the price is right. We refurbished our kitchen a few years back, and while out searching for the right granite counter top, I took plenty of photographs of the various granite and marbles, but none were green. Take them into Photoshop, and with a couple of well placed clicks I was able to turn my images into perfectly suitable green marble backgrounds.
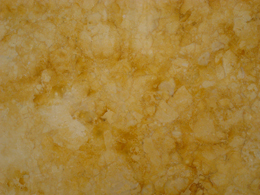
gold marble

This is the original photograph of the marble.

green marble

By applying levels to increase the image’s contrast, and then applying a hue and saturation effect, the result is this rich, green marble-like background.

There are only two steps to go from the original photograph of the gold marble to the green. First, I created an adjustment layer for “levels” to increase the image contrast. The adjustment layers are forgiving in that they allow you to manipulate the data at any time without destroying any of the original pixel information.

The second step is to create and adjustment layer for “hue and saturation.” There are three areas that can be changed within the H&S palette, but before changing anything, click on the “colorize” button. This extracts all the color from the image, assigning a default hue to all the pixels, while maintaining their original values.  Next, the hue slider cycles through the “rainbow” — ROY G. BIV (red, orange, yellow, green, blue, indigo, violet) — stop at the desired green hue. The saturation slider adds or subtracts color, and finally the bottom slider lightens or darkens the values.

Of course, to achieve the desired result might require additional steps, depending on the nature of the original image. You might want to add additional layers of color, transparency, contrast, and texture to create a unique effect.

If you want to create a library of backgrounds and textures, do it yourself. Textures exist everywhere, and for every photograph you take, you can manipulate it in an infinite number of ways.

With today’s image editing programs, you don’t have to mortgage your home or rent out your kids to afford amazing software. I’m currently experimenting with an app called Pixelmator, a $15 Photoshop wannabe, and after half an hour of playing (and they call it work), I can say it’s certainly worth the investment. In fact, I’d recommend Pixelmator to any of my beginning design students who have a newer Mac, but can’t afford Photoshop. This app works on my iMac, now that I’ve upgraded to Lion, but Pixelmator will work with OS10.6 or later. With a little coaxing, I could be persuaded to show and tell more about this cool app, Pixelmator.
Flowers, Color, Form Background for Business Card

Graphic designers have lots of problems. With every job we accept we’re presented with problems that are begging for solutions. Recently I was presented with a problem…a purple and green flower for a business card for a massage therapist in the middle of winter…in Southern California. No sweat.

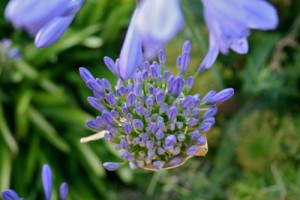
lily of the nile

This is the full frame of the image that became the foundation for the business card.

When I took a series of digital photos on the macro setting, I was thinking about colors (purple and green) and holding still enough to focus the camera on a target that was swaying in the breeze. I wasn’t worrying about composition. Just keep the flowers in the frame before the wind catches them.

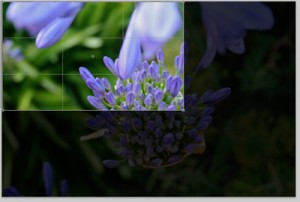
I had no idea if these Lily of the Nile would have any chance of working on a business card. I had taken the photos weeks before, and when it came time to buckle down and create the image that would carry the business card, I found my answer by looking at the flowers, not as a whole, but for their “parts.” Perhaps there is just a small part of the image that contains the necessary elements to play a supporting role to the typography?

In order to isolate just the right section of the image, I worked in Adobe Photoshop, but most image editing software has a cropping tool or a selection tool with the ability to crop to a selection. In Photoshop, I fixed the width, height and resolution of the cropping tool to 3.75 inches by 2.25 inches, 300 pixels per inch, adding one eighth of an inch to all four sides to allow for a bleed. When fixing a cropping area, the size of the area can change, but the correct proportions remain constant.

Photoshop's cropping tool can isolate a precise area, resize and resample the pixels to the desired resolution in a single step.

Once a specific area of the image is isolated and cropped, that segment of the photo now stands alone at the correct size and resolution to become a unique background for the business card. The same image could just as easily be cropped and sized for greeting cards, postcards or bookmarks.

Typography is always a challenge. When white type is reversed out of a background, in this case, a moderately busy background, it begins to get lost. It’s almost gobbled up by the very background that’s intended to support the type.

To prevent the white type from becoming too difficult to read as it moves over alternating light and dark leaves or purple petals, a dark green is sampled from the background and used to give it an “outer glow” effect. If reverse type is placed over a purple petal, sample a slightly darker purple for the outer glow to allow it to “pop” off the background.

type before outer glow

type after outer glow is applied

Because we designers are never satisfied with just one version of our layout, I used two different photos with a variety of type alignments before sharing them with the client.


Type as background provides TEXTure for art

by Georgia Lange

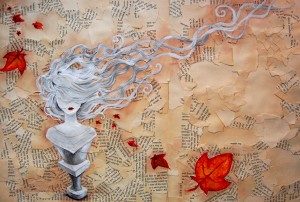
The trend of using text as a texture in art is one that is increasing in popularity. There are many different ways in which to incorporate this technique, and it can be applied to many different trades, including fine art, illustration, graphic design, and digital photography. One of the most interesting aspects of this technique is that it can be manipulated to suit just about any artist’s style. One method, which is most commonly used amongst graphic designers, is to use text to fill or create a shape. Another method, one of the most popular, Continue reading