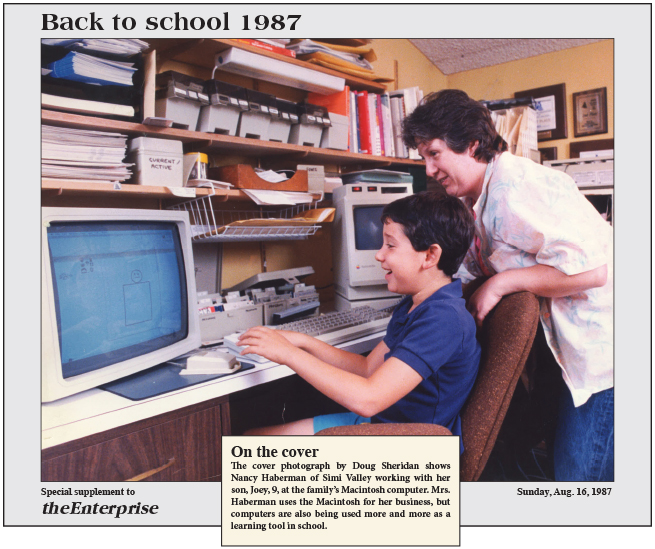
Very few people understood what we Mac Fanatics were up to in 1987 (let alone 1985), but I was following my dream of designing and printing from the desktop. The following month I made the business official and called myself Desktop Design. Today is little Joey’s 36th birthday. He currently works for Disney Studios as a Global Analyst. Happy Birthday, Joey!
Tag Archives: digital
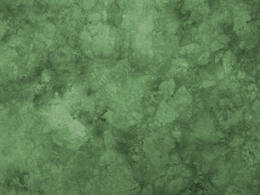
Not Another Green Marble Background?
For a designer, creating a new look for a green marble background is like bringing out the old bell-bottoms and believing they look as cool as they did in 1969.
Filling a “simple” request can be not-so-simple if you make a lot of blind starts, like spending an hour hunting down an old CD filled with stock marble images, just to find they are in an outdated graphic format.
A second blind start—searching stock images—another hour easily wasted as I realized, why not create an original image? Not only can it be easy, but the price is right. We refurbished our kitchen a few years back, and while out searching for the right granite counter top, I took plenty of photographs of the various granite and marbles, but none were green. Take them into Photoshop, and with a couple of well placed clicks I was able to turn my images into perfectly suitable green marble backgrounds.
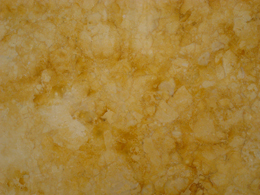
There are only two steps to go from the original photograph of the gold marble to the green. First, I created an adjustment layer for “levels” to increase the image contrast. The adjustment layers are forgiving in that they allow you to manipulate the data at any time without destroying any of the original pixel information.
The second step is to create and adjustment layer for “hue and saturation.” There are three areas that can be changed within the H&S palette, but before changing anything, click on the “colorize” button. This extracts all the color from the image, assigning a default hue to all the pixels, while maintaining their original values. Next, the hue slider cycles through the “rainbow” — ROY G. BIV (red, orange, yellow, green, blue, indigo, violet) — stop at the desired green hue. The saturation slider adds or subtracts color, and finally the bottom slider lightens or darkens the values.
Of course, to achieve the desired result might require additional steps, depending on the nature of the original image. You might want to add additional layers of color, transparency, contrast, and texture to create a unique effect.
If you want to create a library of backgrounds and textures, do it yourself. Textures exist everywhere, and for every photograph you take, you can manipulate it in an infinite number of ways.
With today’s image editing programs, you don’t have to mortgage your home or rent out your kids to afford amazing software. I’m currently experimenting with an app called Pixelmator, a $15 Photoshop wannabe, and after half an hour of playing (and they call it work), I can say it’s certainly worth the investment. In fact, I’d recommend Pixelmator to any of my beginning design students who have a newer Mac, but can’t afford Photoshop. This app works on my iMac, now that I’ve upgraded to Lion, but Pixelmator will work with OS10.6 or later. With a little coaxing, I could be persuaded to show and tell more about this cool app, Pixelmator.
Panorama phone apps stimulate imagination
This past weekend I was immersed in the unpleasant chore of paying bills, when I reached for a pen and instead, my clumsy grasp sent a cup full of pens spilling over the edge of my desk and into a box full of old cards. Reluctantly, I got up out of my chair and fumbled through the box, my eyes landing on some old photos stored in a clear plastic box.
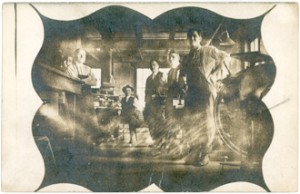
Upon seeing the fading image my grandfather as head pressman of the print shop where he worked, I realized I had not scanned the photo, which I thought might make a good retouching project for my Photoshop students.
And then, much as I hated to, I had to stop myself from wandering off track, but when I saw this new 180-degree panorama image juxtaposed with the circa 1920 image of my grandfather, I couldn’t help but marvel at the technology built into our mobile devices.
As I mentioned in my article on “grunge” apps, now that we’ve mastered the doctored image to near perfection, we’ve gone on to mimic effects like the vignette, the scratches, and the light leaks in this aged image. And now we can create 180-degree, 360-degree, and even cave-like images projections that totally surround.
As a kid growing up in the 50s, the Dick Tracy watch was science fiction. Who’d thunk that as an adult, I’d have my very own communication device far superior to anything Dick ever imagined? This week I’m into panorama apps, but note that this is not intended as a review or comparison of specific applications, but instead, a reflection of my limited experiences with panorama apps in general.
Typically, if you’re shooting with a normal lens, you can achieve a panorama effect by cropping and zooming into a very narrow area of an image. That’s essentially what you get when you order a panorama from the drug store, or your local film processor.
Among its many automation features, Photoshop has a fairly sophisticated blending function called “photomerge.” These days, however, I’m into “quick and dirty,” but I don’t really see the “dirty” in an app like AutoStitch from Cloudburst Research. It’s incredibly simple to use and has impressive blending and exposure algorithms.
I’ve been making images around the college campus where I teach, and one of the effects when shooting these panoramas that has intrigued me ever since I studied photography is that of the disappearing people. I’ll never forget the sense of awe I experienced when seeing the photographs of Ralph Eugene Meatyard. The children in the images had disappearing faces, an effect all photographers have experienced when using slow shutter speeds while the subject moves.
It’s one of those things that started me thinking about how untrustworthy human vision is, and the fact that we don’t see something doesn’t necessarily mean it is not there. It just means that our senses are not acute enough…and you can extrapolate whatever you want from that. My next project is to turn some of these panoramas into bookmarks that I can include with the gifts I give during the coming year.
Type as background provides TEXTure for art
by Georgia Lange
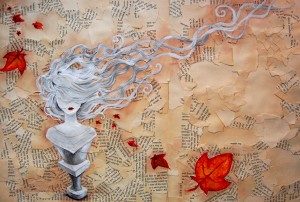
The trend of using text as a texture in art is one that is increasing in popularity. There are many different ways in which to incorporate this technique, and it can be applied to many different trades, including fine art, illustration, graphic design, and digital photography. One of the most interesting aspects of this technique is that it can be manipulated to suit just about any artist’s style. One method, which is most commonly used amongst graphic designers, is to use text to fill or create a shape. Another method, one of the most popular, Continue reading
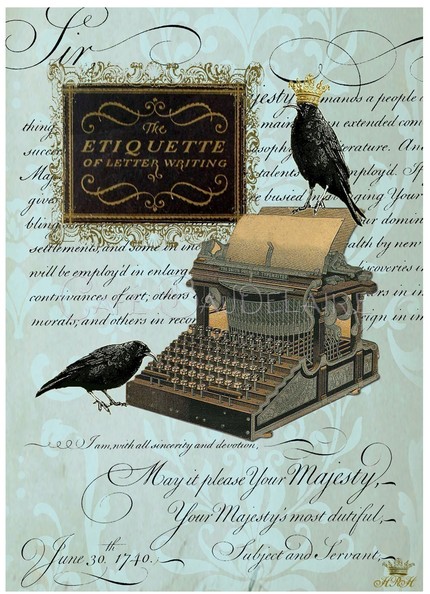
THE ETIQUETTE OF LETTER WRITING
by Georgia Lange
Original artwork and design by Wendy Patterson of Cafe Baudelaire
etiquette |etikit; -ket| – noun
the customary code of polite behavior in society or among members of a particular profession or group
Several months ago, I was listening to NPR and tuned into a discussion about handwriting. It was under debate whether handwriting is a dying practice in the digital age of communication. People rarely write hand-written letters anymore; the vast majority simply send an email or a digital greeting card. As I listened to the discussion, my inner fine artist started to cringe; I remember hearing similar discussions at the School of the Art Institute of Chicago (SAIC) over the future of painting, museums, hand-drawn animation and so forth. Traditions live on because we as a society choose to honor them by continuing their practice. There is something special about the tradition of creating things with our hands, and it is important not to lose the little things (such as handwriting or hand-written letters) just because modern technology makes it so much easier for us. Whatever your craft, your hands are as unique as your fingerprints. What you create using them is just as unique as you are, and just as precious.
Sending a hand-written letter has a much more personal and classy touch than an email. There are many ways to turn your hand-written letters into something extra special. Try writing with a quill pen or sealing your letters with a wax seal. This adds an artistic element to your letters giving them a more vintage and romantic quality. Check out nostalgicimpressions.com for an excellent selection of sealing wax, seals, and quilled pens. If this kind of etiquette appeals to you, than you are truly an artist at heart. Creating your own greeting cards with your art on them is the best way to turn your letters into gifts.
Giving someone a piece of your artwork, be it a print or an original, is a truly special kind of gift because it comes directly from you, and it makes the recipient feel just that much more special. The same principle also applies to greeting and gift cards. Maybe there are people in your life that you feel you do not have a close enough relationship with to warrant giving them a gift, but you still feel the need to let them know you are thinking of them. You may also have friends who are spread out across the country to whom you cannot afford to ship presents, but you still want to wish them a happy holiday season. Sending a greeting card with your original artwork printed on it is similar to sending a fine art print on a smaller scale. If you have your greeting cards printed in a 4 x 6 or 5 x 7 inch size, the recipients can easily place it in a frame turning a simple card into a work of art that can hang on their walls. It is also cost effective and allows you as an artist to market your work and your talent. Save that box of holiday greeting cards that you bought on post-holiday sale at Barnes and Noble or Borders last year and make your greeting cards more intimate and personal with a touch of the artistic and a touch of you.
Art Fair Necessities: Learn from the Pros
by Georgia Lange
Last month I paid homage to the prestigious Beverly Hills art show known as the “Affaire in the Gardens”. This art show features over 200 nationwide artists and attracts up to 40,000 spectators every fall and spring since 1973. If you are a fan of outdoor group art shows and fairs, Affaire in the Gardens is top of the line. Even the Andy Gumps are swank at this renowned event.
The Affaire in the Gardens art show is almost too prestigious to be labeled an “art fair”; these individuals are not selling candles and clothing. In researching the exhibition guidelines, I learned that all wearable art and accessories (with the exception of jewelry) is strictly prohibited. Although this particular art show may be out of the traditional art fair league, no one can say that its magnificent display methods cannot be used as a model to other artists for other art shows.
How do these artists prepare for a show such as the Affaire in the Gardens art show; how were the booths set up? How was the necessary equipment acquired? What did each artist offer to promote his or her work? This article is specifically geared towards artists who may want to participate in the Affaire in the Gardens art shows in the future, and how one can prepare for application and participation. However, many of the principles discussed here could be applied to outdoor art shows other than the Beverly Hills art show. It is important to remember that every art show has different guidelines, and it is vital to do the research and examine the requirements before beginning the preparation process. Pay strict attention to deadlines and be at least partially prepared before applying, and remember that what applies to one show may not apply to another.